Working With GIT
If you are a software developer, its mandatory to know what git is. I hope this page will make you understand what git and how it will be useful to you. Before getting into practical tutorial of GIT, Let me first get you with some boring histroy and other content. When Linus Torvald was developing “Linux”, he find very difficult to manage several things like different versions of release, collaborators for the projects,.. and more. So he thought of making a framework that can address this problem. After on, he came up with a solution and named that with his behavior GIT (git means unpleasant man). And later on several web platform emerged to help developers to help in collaboration, version control and maintaining their projects with help of git. (Eg: github, gitlab..etc..).
This tutorial will make you in learning GIT in basics and intermediate level for working on open source projects and contributing to some libraries,..etc. There are 2 main prerequisites before starting the tutorial.
- To have a Github account. https://github.com/join
- To install git in your working system. https://git-scm.com/book/en/v2/Getting-Started-Installing-Git
To check whether GIT is installed in your system, type
git –version
and make sure the terminal gives you the version number of the git installed (Like shown in the image below)

There are two ways in starting a Github project.
1. Creating a new repository in Github and Cloning it in your local system.
Initially for creating a git project, login into your Github account and visit to this link. You will be asked for details for your projects as shown in the below image.
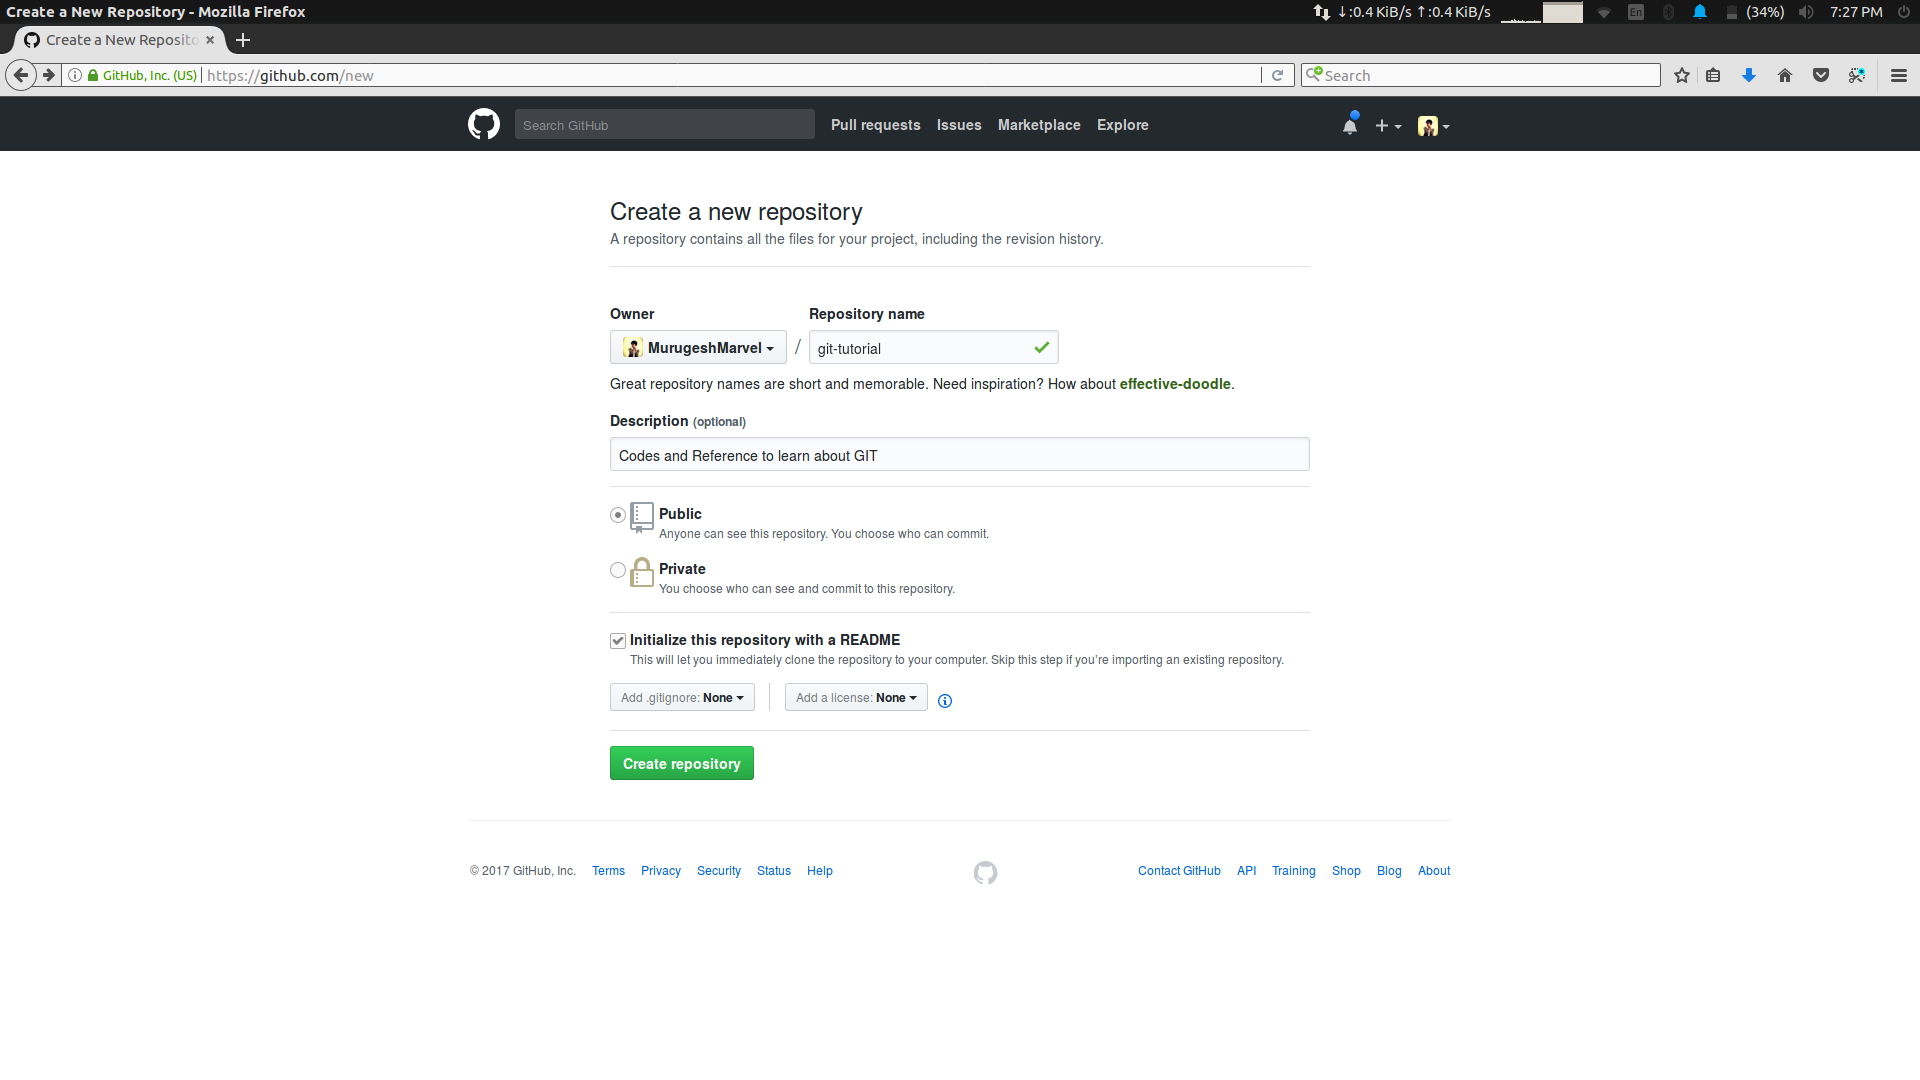
The details to be filled are as follows:
-
Repository Name : Name of your repository with which your project will be reffered. - Description: A short description of your project which will let other developer to look into your project.
- Public (or) Private: You can select any one of this option. If you make your repository as Public, it will visible to all developers and anyone can contribute for your repository. The other option is making your repository Private, my doing this you can prevent people to view your repository and codes but you have to pay for making your repository as Private one. If you are a student, you can try for Github Student Developer Pack [https://education.github.com/pack] by which you can make your repository Private without paying money and also you get more free goodies with it.
- Initialize your Repository with a README: README.md is one the important file for project. This file projects what exactly your project is?. Developing a good README.md file will add more value to your repository. You can refer this post for learning how to develope a cool README.md file.
- Adding .gitignore file: This file tell git to not include some files to the remote repository. We will cover .gitignore in the next part of this tutorial.
- Adding License file: If you work on a really serious project, and to protect your codes being used by other or commercial purpose,..etc.you can add a license file for your repository. There are several Types of license that can be applied for your project depending on its type, you can refer those types in this site.
After providing relevant details you can click “Create Repository” for creating your repository.
Then to add working files and codes of your project to your repository, you need to clone your repository in your local system.
For cloning a repository, you need to get the https link of your project as shown in the below image.
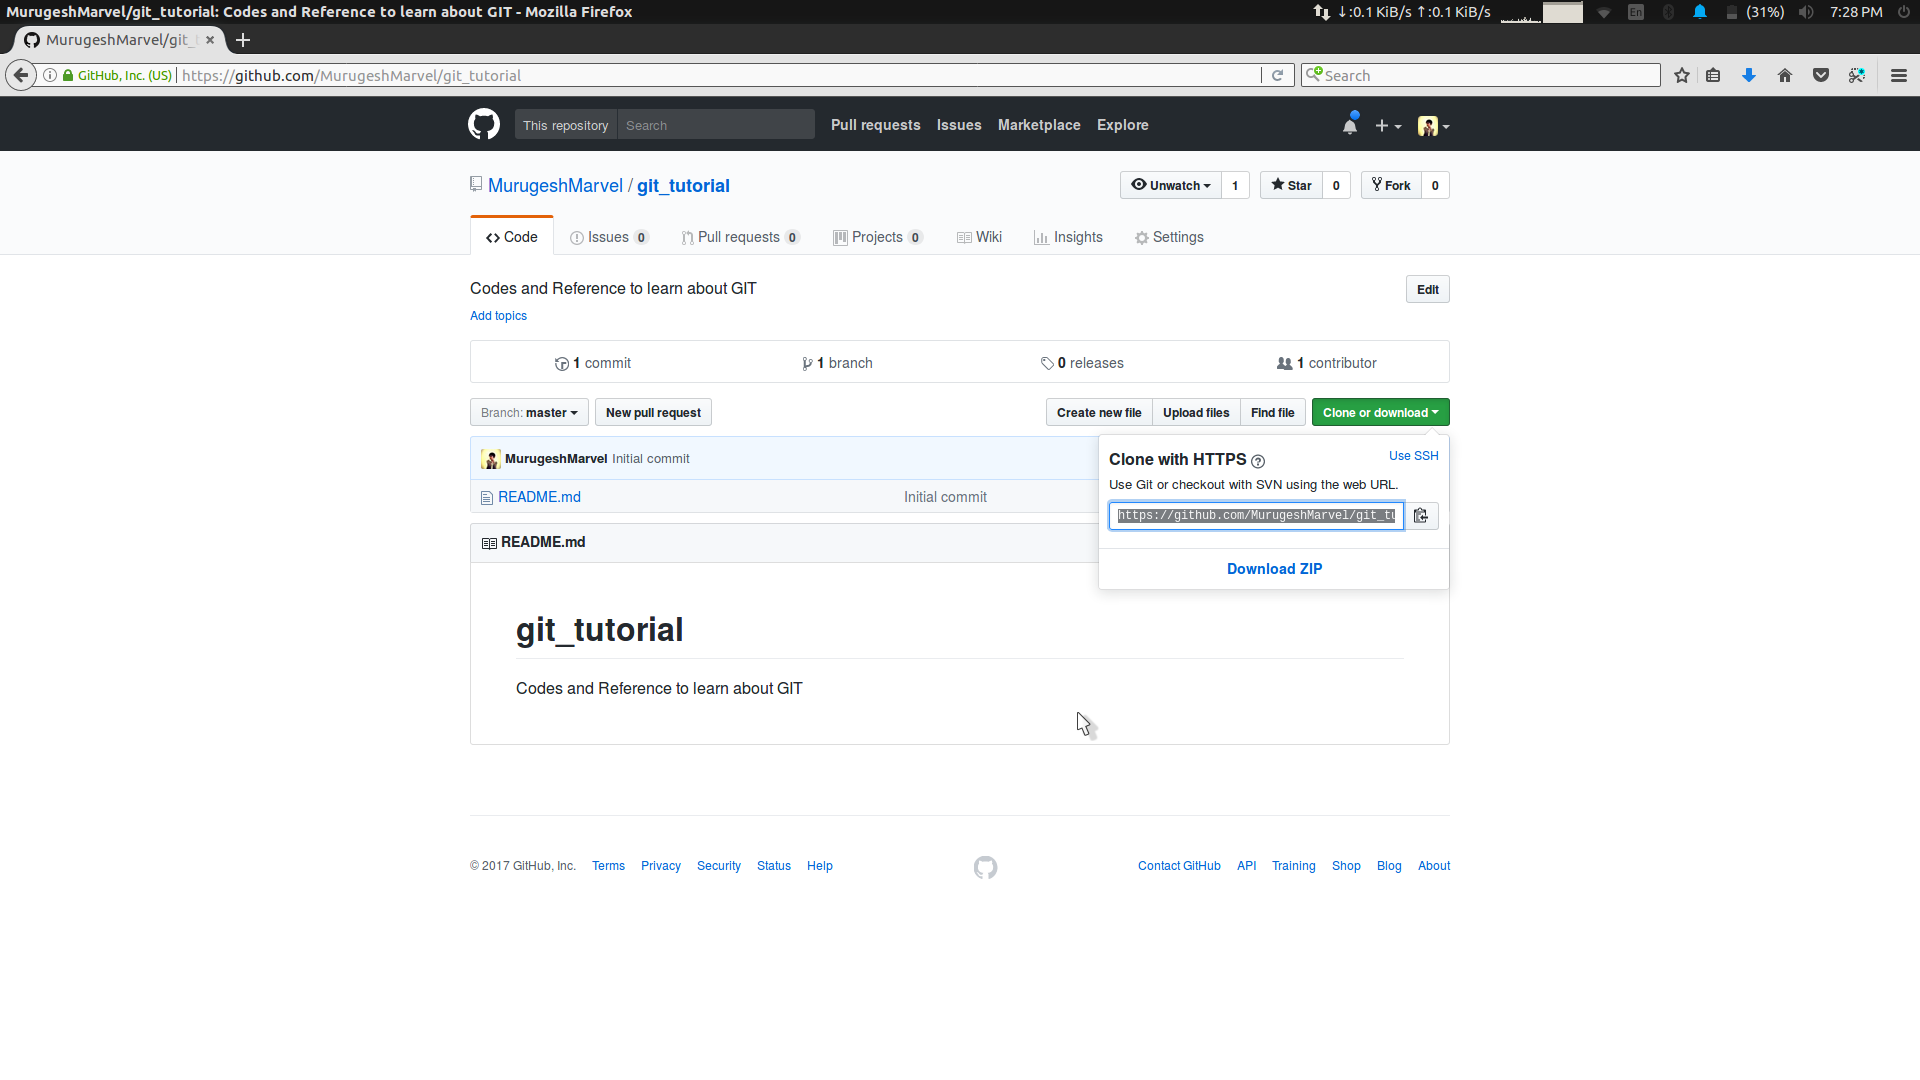
After copying the Https link, go to your terminal and type
git clone <Https Link>
as shown in the image below

Then if you get into the repository folder newly created, you can see the README.md for your repository as show in the below image.

Great, we had successfully cloned our repository in our local System and further we can add or change files in the repository which we will discuss after after discussing on the second method of starting a Github Project.
2. Creating local project folder and link with the github repository.
Initially creat a Github repository as we done in the first step. Then create a new folder in your local system. Now the folder you had created is just a normal folder but you need a git supported folder for linking to your repository. So you can initialise git in the particular folder using the following command after getting into the main project folder.
git init
I had created a folder name “git_tutorial” and initialised git in that folder as shown in the below image

Now this folder is just empty one, let we link remote repository with this folder using the following command
git remote add origin <https link>
The https link is the link of your github repository which is needed to be linked. The origin refers to the local folder. Even after adding the remote repository the files are not update. So for updating the files the following command is used.
git pull origin master
The master here refers to the branch name of the remote repository.
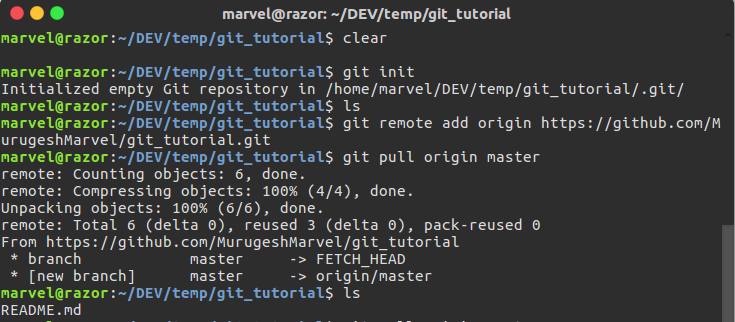
Great, We had successfully linked our local project folder with the remote repository and pulled the README.md file from our repository.
Now let us start making some changes in the README.md file push back to the repository.
Let me some lines to the README.md file in the local project folder. Then this changes will be shown only in the local file and not in the remote file. For updating this change to the remote repository. We have some series of steps to be followed.
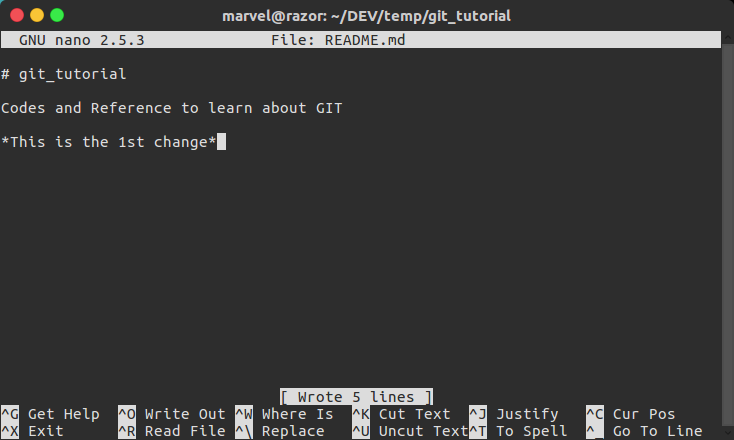
After changing the file, type the following command in the terminal
git status
Then you will see the file name that is been change had been marked in red color. Further we add the file to our stack for committing using the following command.
git add README.md
In case if you change multiple file and want to add all the file, you can use the following command.
git add .
now when check “git status”, will see that the file had been marked in green color as shown in the below image.
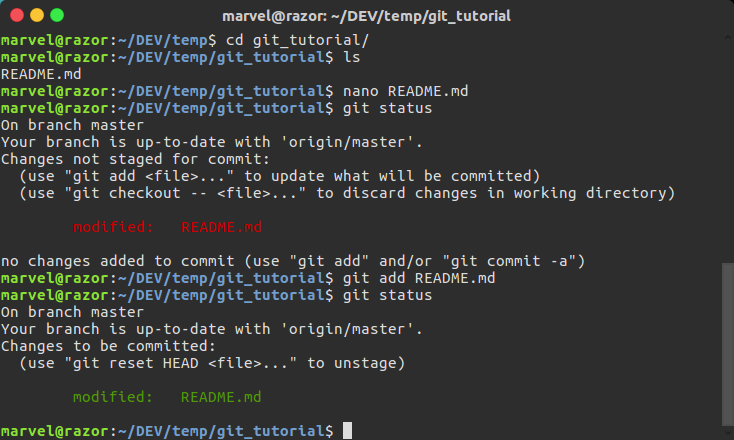
Then we need to commit the file for push using the following command.
git commit -am “<Reason for changing the file>”
Committing a file is necessary so that people will come to know why you changed the file. After successfully committing a file, when you check for “git status” you will see no error messages and so you file is ready to be pushed to the remote repository.

For pushing a committed file to the remote repository type the following command in the terminal.
git push origin master
You will be asked with the username and password for push the file. After the your file will be pushed to repository.
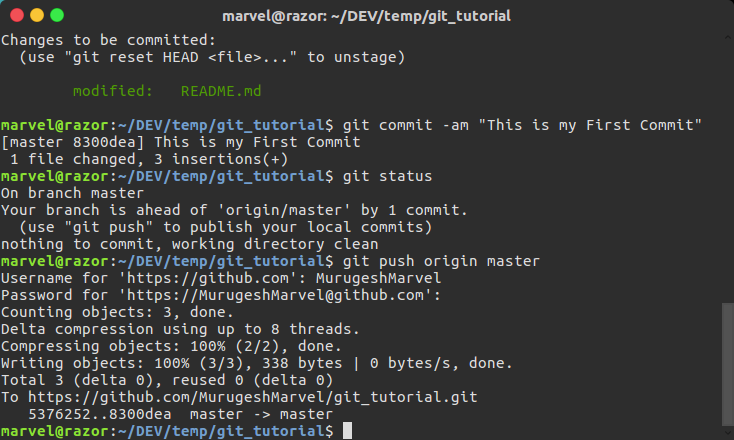
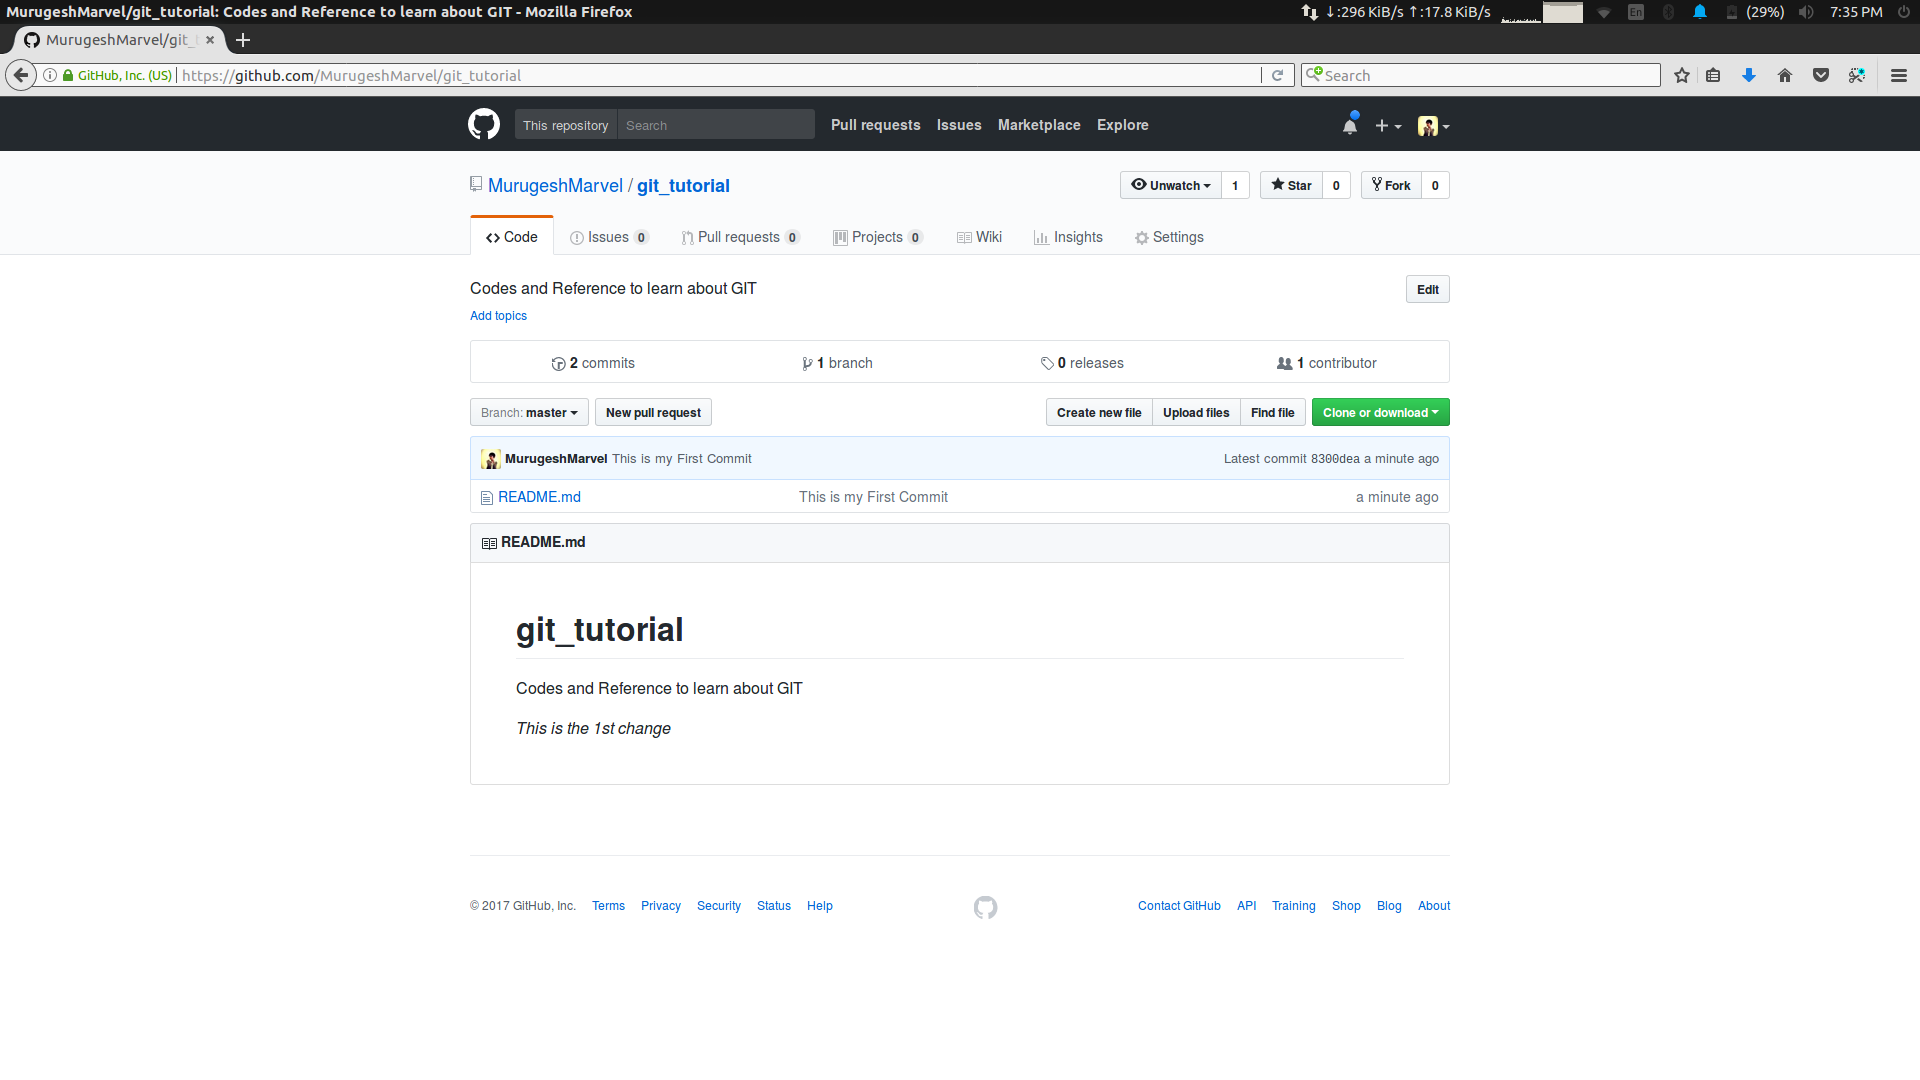
And you can check the github repository for verification.
Now, we know some basics on how to work with git. In next part you will get to know things like branching, pull request and many other.